Finally posting pictures 11/30/13
First, a few more detailed shots of the various parts.
The belt is made of Christmas metallic mesh ribbon, spray-painted copper, and laid over fabric. It was then embroidered with beetle wings and other things.


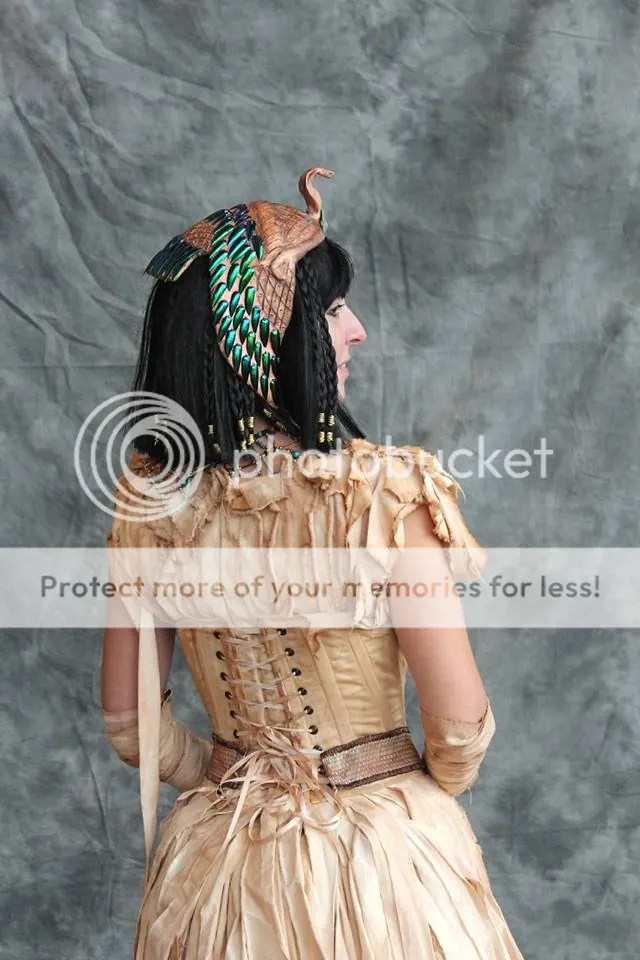
I made the headdress by making a “cap” of plaster gauze, then cutting wing shapes from cardboard, putting the wings into position, then layering more plaster gauze over the whole thing. After the gauze had dried, I pressed a thin layer of Paperclay over the whole thing, and carved decorative shapes in it. Then I sculpted the cobra head from more Paperclay, attached it, and painted the entire thing. Lastly, I glued on a bunch of beetle wing “feathers”.
It was fairly simple, and turned out pretty well.

I wore it Steamcon this October, and it was surprisingly easy to wear. I was rather worried I’d be tripping over wrappings all day, but (for the most part) that didn’t happen!
The paper silhouette cutter did one of me in this costume – and said I might actually make it into the art book she’s currently working on. Wouldn’t that be cool?

Professional photographers Thom Walls and J. Krolak were there, and they were kind enough to take a ton of pics of me. Here are just a few.


You can read more about my adventures at Steamcon V here.
Almost done…and just in time, too 10/22/13
My costuming schedule was shot to hades this year. After Gallifrey One was over, I just stopped sewing entirely and took a gardening-and-raising-quail holiday. BUT I needed new costumes for SteamCon, because one always needs new costumes, right? Usually I have at least three new costumes, and often four.
This year, I will have one. This one. And I’m only finishing it by the skin of my teeth.
I still need to finish the belt, the gloves, and the headdress (and I hope to make a mummified crocodile purse.)


It is a LOT of work to distress this much cotton. So tired of doing it, by the time I was done. And I could have done more, really.
The collar/necklace I beaded myself. I could not find a cheap source of clay mummy beads, so I ended up buying a mummy bead egyptian collar off ebay, pulling it apart, and putting it back together my way.
The heart scarab has a bicycle safety light underneath. I sculpted a top from Paperclay, painted it, and carved ‘cracks’ in it for the light to show through.

I love the front of the skirt. It’s my favorite part.

I’ll be wearing this costume at SteamCon on Saturday, at least. For the other days I’m thinking I’ll wear the Airship Pirate Steampunk (with a green wig and a little crocheted octopus in honor of Guest Brian Kesinger) and one other that I will probably put together out of bits and pieces of other steampunk outfits.
Come and find me. I have ribbons and postcards from my Kickstarter!
Steampunk Mummy 6/1/13
I was intending to make this one for Steamcon last year, but it got dropped because I ran out of time. Plus, I wasn’t *quite* sure how I wanted to make it! But it is definitely going to Steamcon this year, and it still fits the theme “Around the World”. What is more natural to travel than a revitalized Egyptian mummy? 😉
I started with three king-size cotton sheets picked up from the thrift store. I made a button up fitted bodice – no hemming, no finishing of any kind – then tore strips of cotton, distressed them up a bit, and sewed them over the bodice.
This is how it looked. The Egyptian collar is just for fitting purposes; I am going to make a much nicer antiqued collar myself.
Also, I have just pinned a band of fabric around the waist, to give the look of the waist-cincher I will be making later on.
Next, I made a cup of tea. But not to drink! I used the tea as a wash over the fabric, to give it a stained appearance. This is how the fabric looked after:

I decided to do the wash after the garment was made, rather than before, because I wanted it to be very uneven, and I wanted to be able to control/choose where the uneven-ness went.
Then, I used the drippy tea bags to sponge over the fabric, giving a darker tint in certain areas. Generally around the worst tears/rips, but also randomly over the fabric.

Then, I took dark brown fabric paint, diluted it with water until it was almost as thin as water, and sponged it into the worst of the distressed areas – and wherever else I thought it would look good. Then I took a bit of less-diluted paint and touched it into a very few areas. 
Looks a lot more like ancient mummy wrappings, doesn’t it?
